Products
Solutions
Resources
9977 N 90th Street, Suite 250 Scottsdale, AZ 85258 | 1-800-637-7496
© 2024 InEight, Inc. All Rights Reserved | Privacy Statement | Terms of Service | Cookie Policy | Do not sell/share my information

With the Sub-Assemblies in the Cost Item Assemblies form, you can easily create and maintain cost item assemblies that model construction systems and contain multiple complex calculations. Sub-assemblies enable the Cost Item Assemblies feature to be more modular, allowing you to maintain smaller, simpler versions of cost item assemblies and reuse them in multiple places.
A sub-assembly can be created within a cost item assembly by simply inserting it as a subordinate cost item.
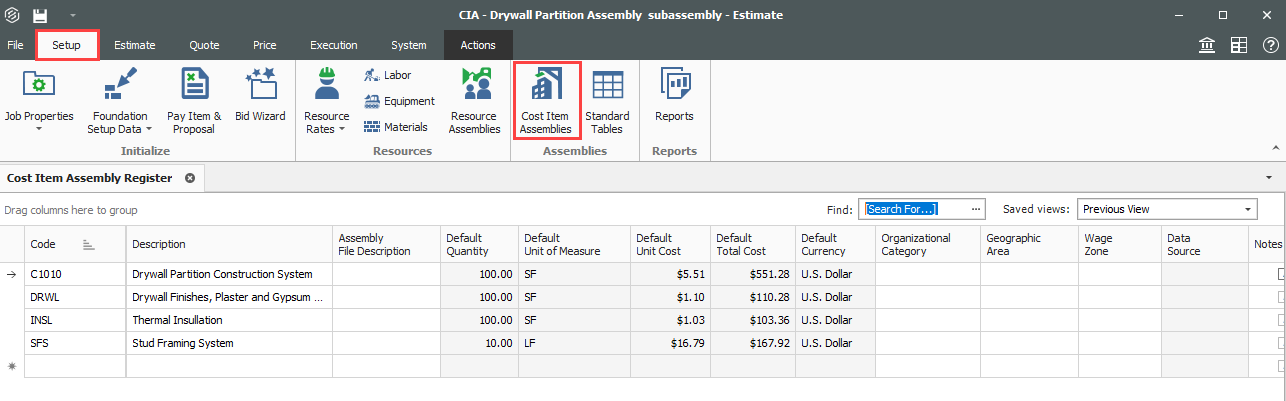
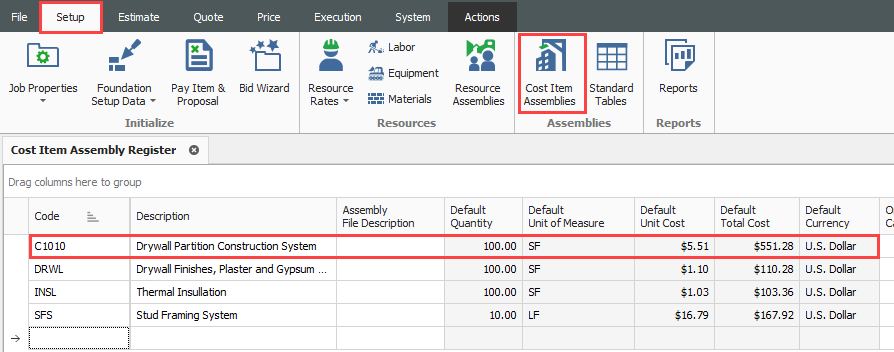
To access a cost item assembly record, select Setup > Cost Item Assemblies. The Cost Assembly register will open.
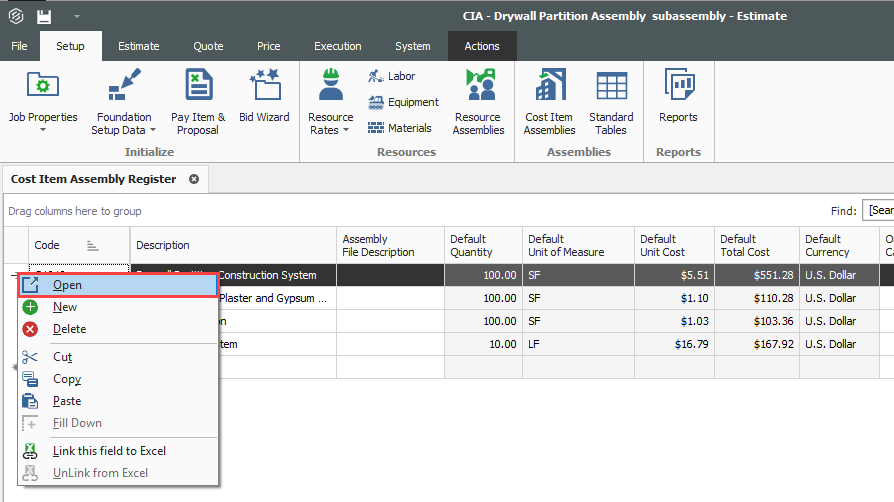
Select the cost item you want to open by double clicking or right click and select Open.
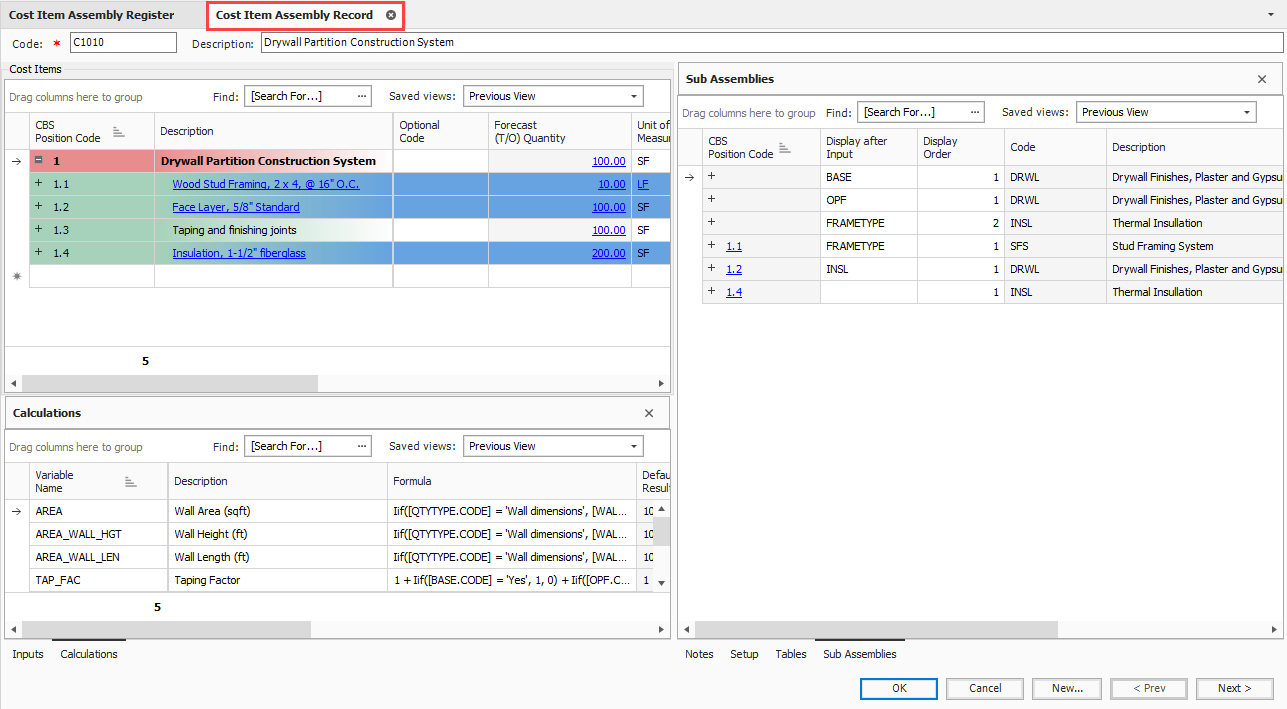
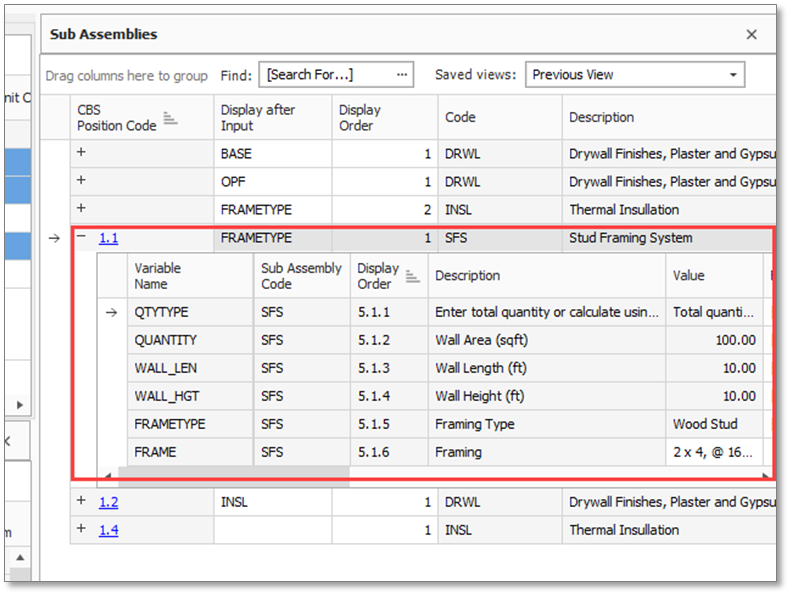
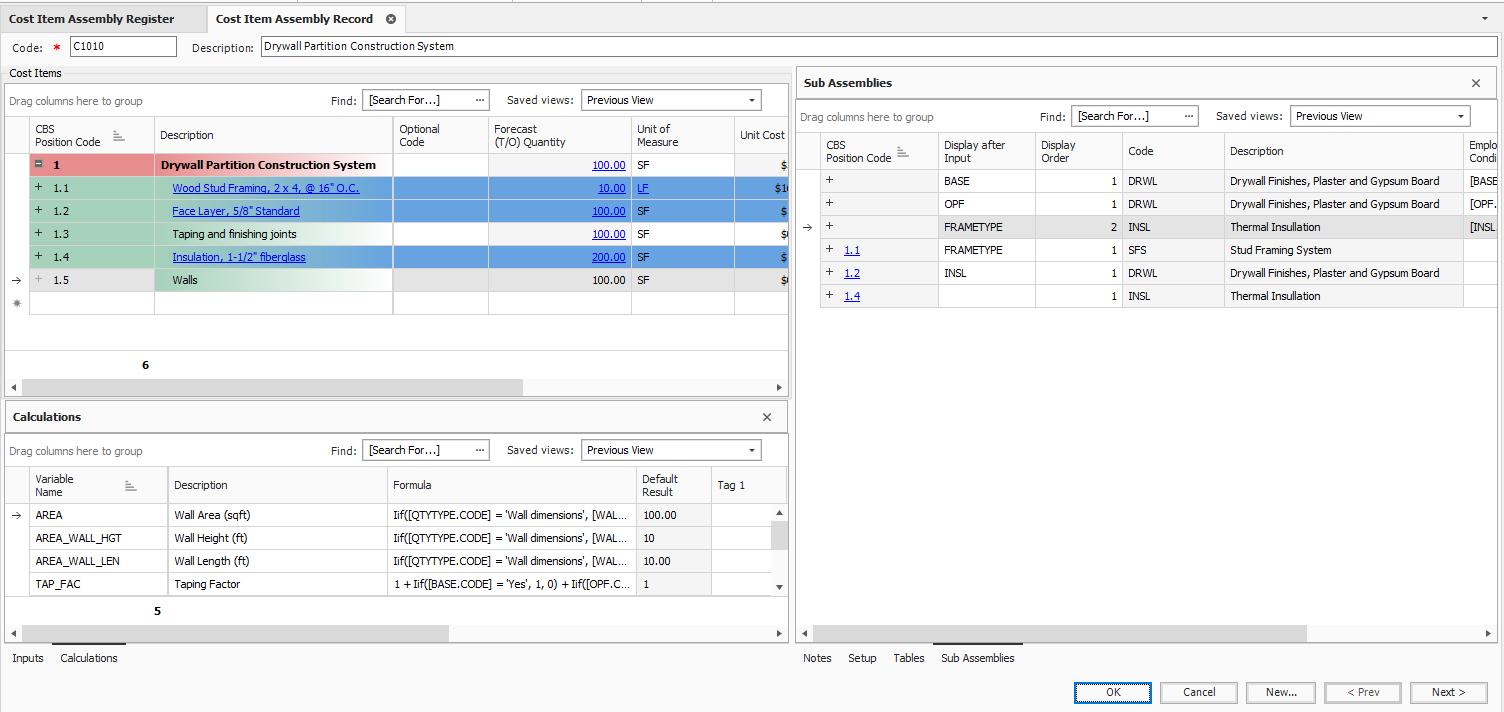
Under the Cost Items window you will see the cost item assemblies listed. On the right side of the screen will be the sub assemblies relating to each cost item.
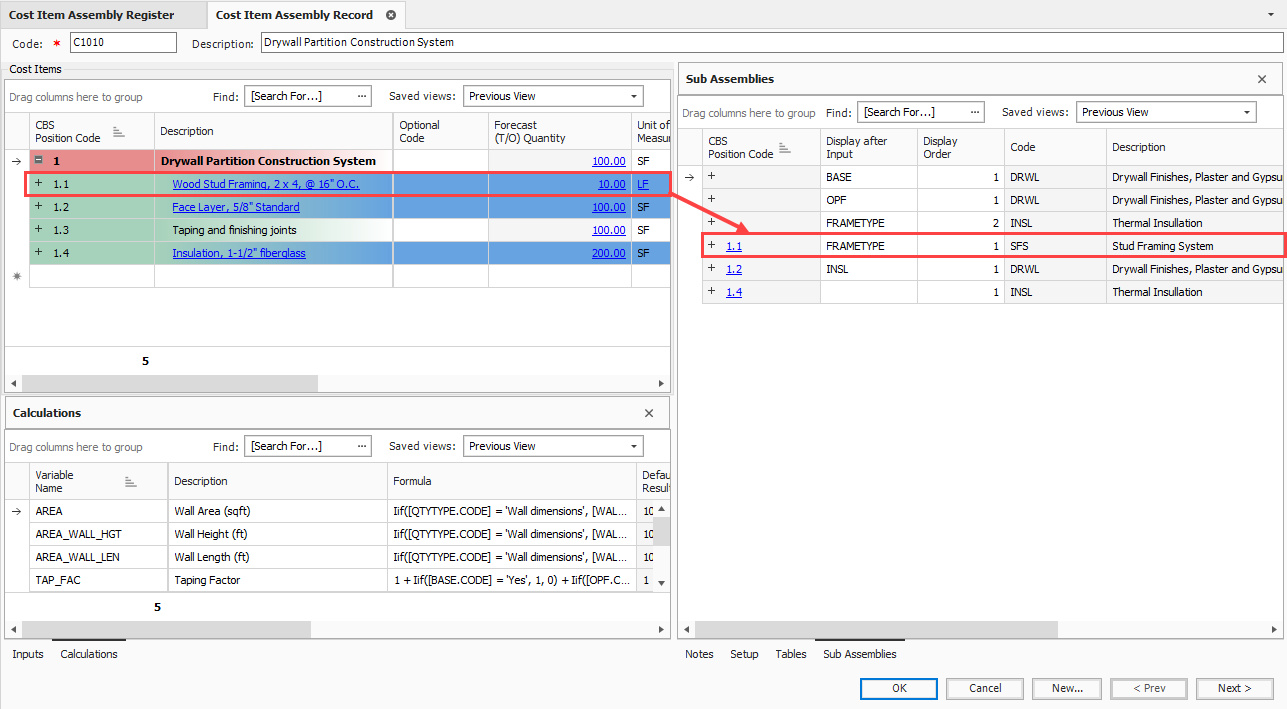
When you expand the sub assemblies on the right, it lists all the elements which make up that sub assembly.
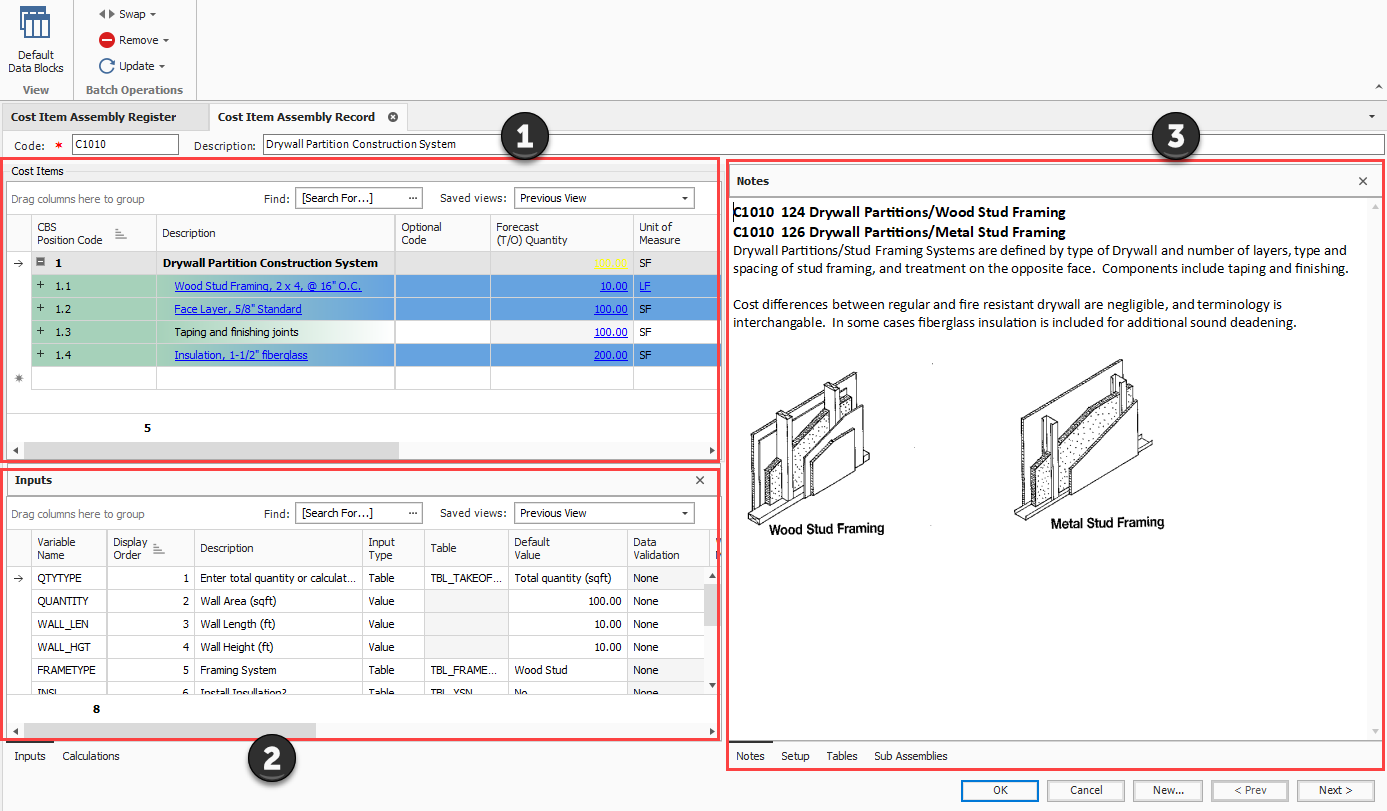
On the Cost Item Assembly Record screen there are three windows. Below are their functions:
| Windows | Description | |
|---|---|---|
|
1 |
Cost Items |
These are the component cost items that will be inserted when the assembly is employed. Fields on the cost items can be linked to Calculations, which are driven by the Input values in window 2. |
|
2 |
Inputs / Calculations |
Inputs: These are the inputs the user will specify during employment of the assembly. These input values drive the Calculations which can be linked to the cost items in window 1. Calcutions: This is where Calculations are defined. Calculations can be based on Input values and other Calculations, and the Calculation results can be linked to fields on the assembly’s cost items and resource employments. |
|
3 |
Sub Assemblies |
Four tabs appear: Notes, Setup, Tables, and Osub Assemblies.
|
Selecting the Default Data Blocks icon in the top left of the screen will change the view of the Cost Item Assembly Record.

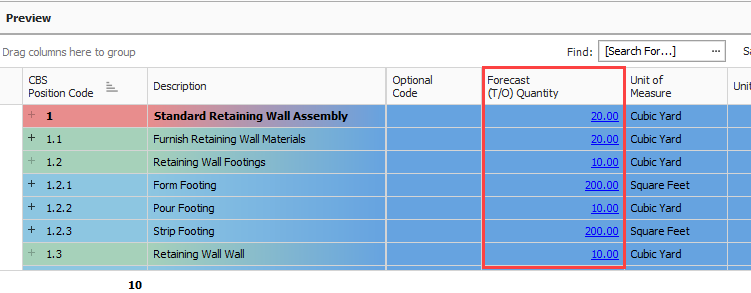
The cost item assemblies input values can then be assigned to the sub-assembly input values for you to answer a question only one time. For example, when providing the total square footage of a wall system, the single input can be used by the cost item assembly and its sub-assemblies. Adjusting values in the questions, will change the preview, as shown below.
From the Cost Item Assembly Record > Sub Assemblies tab, compare how changes affect the Cost Breakdown Structure (CBS) Register:

Changing these values will…
adjust these totals.
Sub-assembly input values can be sorted and shown conditionally based upon your inputs. Then you can employ a cost item assembly which only views the questions that are relevant. For example, a question in the cost item assembly could be, "Is insulation required?". If the answer to the question is yes, then a sub-assembly that defines the cost of installing insulation gets included in the cost item assembly. If the answer is no, then the sub-assembly is not included.
To view the formulas used to calculate the values of the cost items, in the Cost Breakdown Structure (CBS) Register hover over the Forecast (T/O) Quantity line items. This will help you to understand how these values were determined.

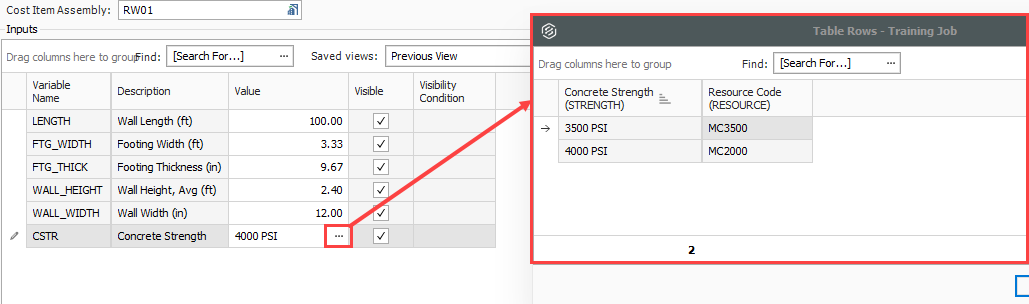
When your Input questions require answers as Yes/No, Unit of Measure, etc., select the field’s ellipse  to open the table screen. Here you can select the item(s) which relate to your initial selection. When OK is selected, the line item will update with the new selection.
Navigate to Setup > Cost Item Assemblies.
Select a cost item assembly.
The cost item assembly record will open
With the addition of “Walls” as our example. select a blank line in the Cost Item Assembly and give it a number and description.
Right click on the line item and select Insert Cost Item Assembly as Subordinate.

The Cost Item Assembly Register sub assembly opens
From this screen, select a sub assembly to add and click OK.

The window for the sub assembly will open with its details
Complete any changes to the values
Click OK.
The cost item sub assembly has been added:

Additional Information
9977 N 90th Street, Suite 250 Scottsdale, AZ 85258 | 1-800-637-7496
© 2024 InEight, Inc. All Rights Reserved | Privacy Statement | Terms of Service | Cookie Policy | Do not sell/share my information